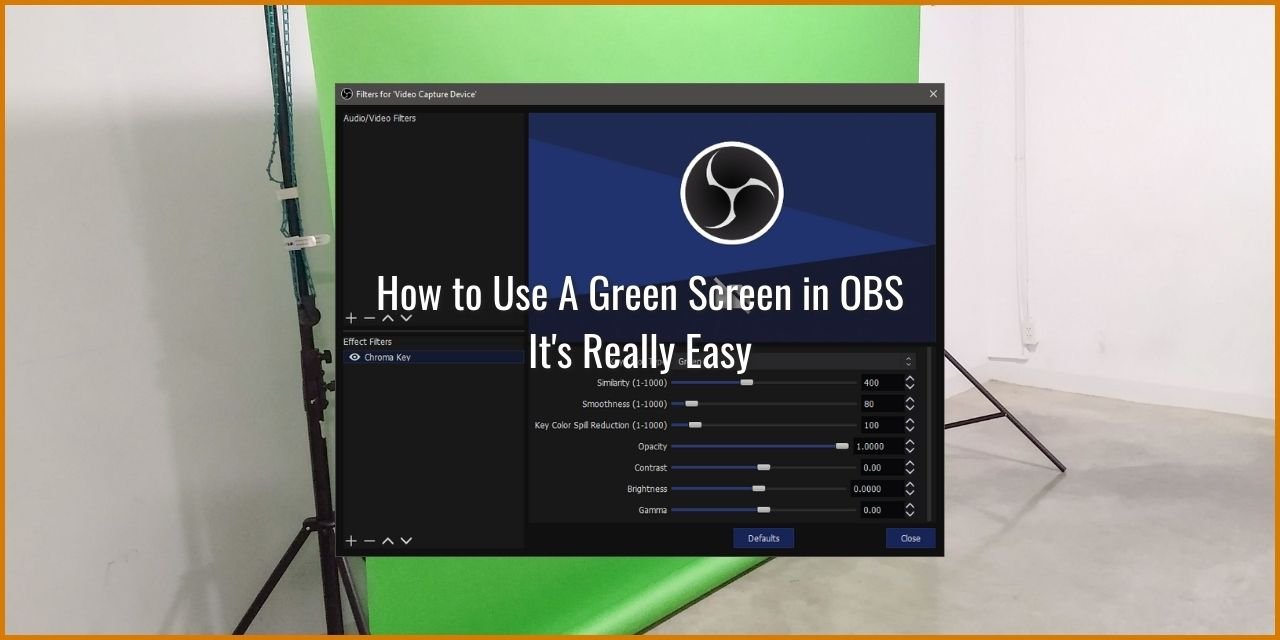
A green screen is one of the key tools in the production of media that makes use of special effects. Those of you who know what a green screen is already will appreciate that little joke. In this article, I’m going to be teaching you how to use a green screen in OBS Studio. Don’t worry, it’s really easy, despite the length of the article.
To start things off, I should explain what a green screen is, for those of you who don’t really know what I’m talking about.
Table of Contents
What is a Green Screen?

A Green screen is simply a plane that is all one color that can be used with a special program to “key out” the color from the scene. This allows you to then super-impose another source of media, and create a composite for rendering, or in the case of streaming using OBS Studio, being output to a live stream.
The second media layer can be CG, or computer-generated using programs like Blender, Maya, 3DSMax; or if you prefer, actual pre-recorded footage. In fact, green screens are what make movie magic special effects possible in the first place. Higher budget studios have entire green rooms, and people run around in full-body green suits during the filming process so they don’t accidentally ruin a shot.
As you can imagine, it can be quite comical on set to see someone garbed in one of those suits. I’ll bet it has been used to make the actors laugh on more than one occasion. (Unless it’s just me who finds this whole thing to be hilarious – that is a possibility too I suppose.)
Here are 5 Good Green Screens To Choose From
Don’t own a green screen? No worries! I’ve curated a list of top-performing green screens for streaming. Dive into my article to find the perfect one for you.
- Elgato’s Floor mounted Collapsable Green Screen – 4.8 x 5.9 Ft
- Elgato’s Ceiling mounted Collapsable Green Screen – 6.56 x 5.9 Ft
These two screens are super handy, in that they are both self-contained units that roll up into a small case when not in use easily. The drawback of these two options is that they aren’t really all that wide, meaning they need to be fairly close to your camera to be used. Additionally, much of the floor-mounted solution often tends to be below the camera’s viewpoint, making it a pretty short screen as well in regards to usable key area.
Finally, these two options are pretty expensive – but that is the price you pay for the convenience of how it stores away super easily.
- Heysliy Green Screen Backdrop with Stand Kit – 5 x 6.5 Ft
This option by Heysliy is one that is substantially cheaper than the Elgato offerings but has no easy way of being stored when not in use – you’ll need to fold it. Of course, folding comes with its own drawbacks, as that introduces creases into the fabric that can make lighting it evenly a challenge. It’s as they say – you get what you pay for.
- AFHT 2-in-1 Green and Blue screen – 2.08 x 2.08 Ft
This next option is actually both a green screen and a blue screen in one. Unfortunately, it sacrifices heavily in the size department, coming in at a mere 2 feet. This is an option for those of you who don’t have the room for a large green screen. The downside is that because it is so much closer to you, it becomes a lot harder to evenly light it, and it can be bumped into by your chair when backing up. Additionally, the rounded corners really cut down on the effective green screen area.
Still, it is a handy option for those of you in tight confines or spaces. It comes with a stand too. If you can fit a larger screen I strongly recommend that you do.
- MountDog Green Screen Backdrop – A Massive 10×12 Ft
The Final option for consideration is the Mountdog Green Screen. This is a massive, and relatively cheap option to use as a key screen, making it an ideal candidate to use for larger rooms. Of course, the large size also makes it extremely cumbersome to put away when you finish using it. If you have the space for this thing, it is easily the most cost-effective option that I know of, outside of DIY using your own ingenuity.
How to Use a Green Screen in OBS
To use a Green screen in OBS, you simply need to add a chroma key filter to your webcam source and adjust the values until they maximize its effect while minimizing the removal of areas that you want to avoid removing. To add the Chroma key filter to your webcam source:
- Right click on the source you want to add the chroma key filter to
- Select Filters
- At the bottom of the new window, under Effect Filters, click the + sign
- Select Chroma Key
Once added, you’ll see something that looks kind of like this: (This is using the OBS Virtual Webcam feature, my C920 is currently put away)

Here’s a fun fact, a green screen doesn’t have to be green – It can be any color you like really. Green is simply a color that isn’t really all that common, so it will work with a large number of props. This is what the key color type field in the filter actually controls – It will key out green, blue, magenta, or really any color you like.
As to why this is an option, well, sometimes you have a lot of green props on set, and you don’t want to key all of them out. Or maybe, you are filming a star whose suit is mostly green. In these cases, you would swap out the key colors to blue. Blue is a little more grainy than green though, due to the fact that camera sensors are more sensitive to green light.
How to Tune the Chroma Key Filter in OBS Studio
Now, I can’t give you the “perfect settings for the chromakey filter in OBS”, because this filter’s settings will vary greatly for you based on your lighting conditions. Instead, I’ll guide you into what is ideal, though the goal is to make it look as good as you can get it. You’ll have to play with it in order to fine-tune it to your needs.
Another important note is that if you have natural sunlight in the room, it will affect the filter, and you’ll have to adjust the settings as the day progresses. Ideally, you’d block the sunlight, and use artificial light to give yourself better control over this.
Here is an article that shows off some lighting options that you can use that work well.
There are Four main settings within the Chroma Key filter:
- Key Color Type
- This setting defines the color that will be keyed out.
- Similarity
- This setting determines the error of color. Shadows on the green screen can reduce it’s effectivenss, and require this setting to be increased.
- Ideally, this should be as low as it can possibly go.
- Smoothness
- This setting will determine the gradient at the edge of the key
- If you have really good lighting, this should be set as low as it can be set, as it can cause the edges of a body to become translucent
- Key Color Spill Reduction
- The green screen will reflect green tinted light out at the subjects due to the physics of how light bounces
- The result is what is known as color spill. This setting will artifically attempt to reduce the effect of color spill.
- It is best to keep this setting as low as possible
The other settings within the filter are usually best left at their default values but don’t be afraid to just see what they do by playing with it. Ctrl-Z will undo any changes you make to these sliders.
As stated above in the list, each of these settings ideally should be set as low as you can make them with the light that you have. The best solution is to add more light into your scene, and incorporate some three-point lighting techniques to reduce the effect of color spill, and more sharply define the edges of your subject. (Your body, in the case of live streamers.)
In fact, you probably should incorporate a dedicated light specifically for your green screen to keep it as evenly lit as possible for it to perform at its best.
How is a Green Screen Typically Used by Live Streamers?
Many streamers who incorporate the use of a green screen will use it to simply remove the background, and super-impose themselves over their gameplay, trying to minimize the amount of gameplay that their webcam takes up. This approach has been pretty popular since 2018. However, there is so much more to a green screen than this use.
Selling an Act – Ways to Differentiate your Stream Using a Green Screen in OBS
Now, I’m, not saying that you have to do this, but so many streamers who use green screens don’t realize the potential sitting behind them. It is so much more than just a simple background removal tool.
For example, you could don a Hawaiian dress shirt, plop on a pair of sunglasses, put some sunscreen on your nose, and run a video loop of a beach in the background. Or, you could get a pilot’s hat, don some aviators, and play a looping video of a pilot’s cabin, pretending you’re on an airplane. Or really anything (that you own the copyright to use anyway) that you can think of.
Here Are Some Popular Choices for Streamer Gear
Hey, thanks for reading the article. Before you leave though, you may be interested in this if you are on the lookout for some handy or helpful things for your streaming setup.
There are a large number of cool products designed to make the lives of streamers and content creators easier or to improve the quality of their setup. Before I do list them though, I strongly recommend that you do your research and check reviews from multiple sources, even beyond those I’ve included here. It is never bad to get a second, third, or even fourth opinion before you make an investment.
Microphones: One of the most popular microphones for live streaming is the Elgato Wave 3 or Wave 1. This microphone is great for streamers because it gives you a ton of control over your audio chain, mimicking some of the features of the venerable GoXLR virtually, without all the wires and complexity.
Here are some reviews that you can reference so you can decide whether or not you’d like to get one for yourself:
EposVox Wave 3 Review / Harris Heller(Alpha Gaming) Wave 3 Review / Podcastage Wave 3 Review
Audio Interfaces: For those of you who’d like to not be limited to a single microphone option, then you’re in luck because Elgato now makes the Wave XLR Audio Interface. This device allows you to use any XLR microphone, including the ever-popular, but gain hungry SM7B without a cloud lifter, and retain the features of the Wave microphones mentioned above.
Here are some reviews of this audio interface:
EposVox Wave XLR Review / Podcastage Wave XLR Review / Harris Heller Wave XLR Review
Lights: Lighting is super important if you care about the quality of your camera feed from your webcam or any camera for that matter. For one, those of you who rely on your monitor for your main source of light will have inconsistent lighting that changes based on what your screen is displaying. The best part is that almost any light will do, as any light is better than no light.
With that said, there are better lights that are designed for production purposes that have better color accuracy, are brighter, and have more control. You can check out some of them in my top 5 lights article. also, having a dim light in your background on a camera scene will look better.