The Advanced Audio Properties in OBS Studio is one of my favorite features. Using it, you can manage your audio sources in powerful ways:
- Adjust the volume percentage in dB or percentage
- Adjust the balance of the left and right channels in a stereo setup
- Adjust the audio sync
- Monitor an audio signal of your choosing
- This means listening to it through your headphones or speakers.
- Define the audio tracks for recording
- and Downmix sources to Mono (for single microphone users)
Table of Contents
How to Access the Advanced Audio Properties in OBS Studio Version 27 and Earlier
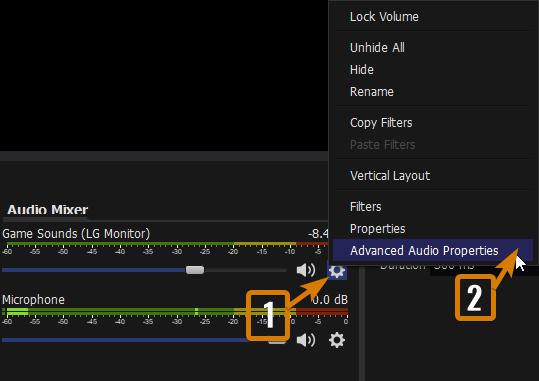
To access the Advanced Audio Properties:
- Left-Click on a gear icon next to an audio source in OBS Studio
- Alternatively, you can Right-Click on a source within the Audio Mixer
- Select “Advanced Audio Properties” within the list that appears.

How to Access the Advanced Audio Properties in OBS Version 28 and Later
In Version 28 of OBS, the dev team changed how you can access the advanced audio properties. To get access to the Advanced Audio Properties in OBS Studio Version 28 and later:
- Left-Click on the button Icon that has a large cog and a small cog within the Sources Dock

- Alternatively, if you Left-Click on the Three vertical dots next to an audio source, you can access the Advanced Audio Properties as well

- Right-Clicking on an audio source in the mixer will still bring up that same toolbox above.
Advanced Audio Properties Features


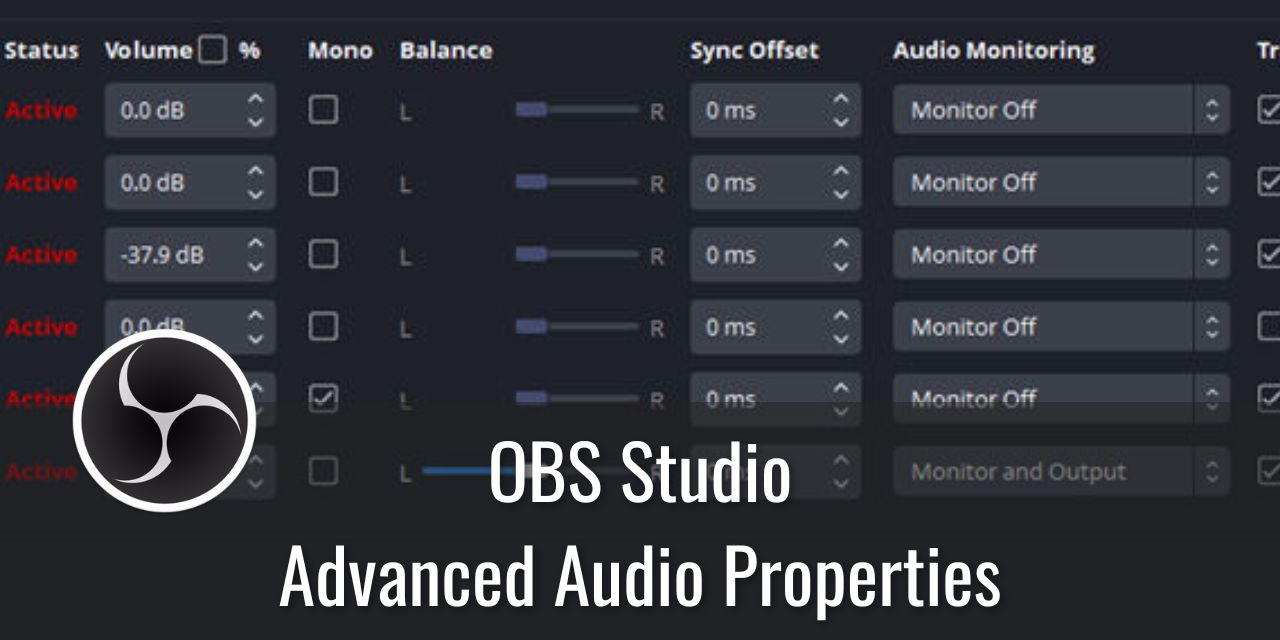
Every audio source you add will be here, including webcam mics and other things. Your list will likely look different from this one, as this has been customized for my needs.
| Volume(%) | shares functionality with the Mixer window in OBS in that it turns down audio that the stream hears while preserving the volume that you yourself hear. This feature is especially important for you because you are able to maintain an ideal volume for stream digestion while allowing you to listen to it at whatever volume you desire(Or not at all!) |
| Status | An indicator of whether or not a source is enabled and is being sent to an audio track. |
| Down-mix to Mono | Enabling this simply sends the first track to all tracks within the source. In newer versions of OBS, this is simply “Mono”. |
| Balance | A setting to define the stereo panning of the audio signal. What it does, is cause the signal to become louder in one ear and quieter in another. In most cases, you want this to be directly in the center. One use case where you will want a signal panned is if you have a multiple-person stream. Panning one microphone a little bit to the left and the other microphone right will make the content seem more natural to our senses and gives your audience subtle cues of who is speaking. |
| Sync Offset | This setting will add an artificial delay to your audio signal to help match the audio up to a video that has a delay to it. Typically, it is utilized by capture card-based webcams that have naturally high latency. In most cases, you do not need to deal with Sync offset |
| Audio Monitoring | Audio monitoring is the main reason I recommend you guys to be familiar with the Advanced Audio Properties. It is an especially important feature in that you can use it to monitor in near-real time any audio source you have in your designated “Audio Monitoring Device” in your audio settings. It used to be under the Advanced tab in earlier versions but was moved to Settings – Audio in a fairly recent update. |
| Tracks | Tracks are used primarily for recorded content. They determine what audio source is output to a specified audio track. Up to 6 tracks are currently available. It is my hope that streaming platforms and OBS Studio add support for multiple audio tracks support. |
Audio Monitoring – The Most Powerful Feature in This Tool
“Audio Monitoring” is easily the most powerful feature available in OBS for Audio. The only other feature that comes close to this in power is OBS’s support for VST plugins.

To utilize this feature, you must:
- Navigate to settings and designate an Audio monitoring device
- I use my audio interface in the above image, but you should use whatever device your headphones are attached to.

A Word of Caution Regarding OBS Audio Monitoring
There are certain situations where the audio monitor might cause some seriously undesirable effects.
For example, if you monitor a device that is being output as a source:
- You’ll end up getting a severe feedback loop
- This can potentially damage or destroy your speakers or headphones
- It can cause permanent hearing damage, too (It gets really, REALLY loud, regardless of the volume of the device)
It is for this reason that, should you ever decide to use audio monitoring in the advanced audio properties in OBS, you should never use the same source within your scenes or audio settings.
Properly used, it is a super useful tool to those of us who don’t have access to near-real-time monitoring from an audio interface.
Having Issues Getting Audio Monitoring to Work in OBS?
Some people have reported that audio monitoring isn’t working for them – Most of the time it is due to user error. If this is the case for you, make sure that you have your headphones or speakers source directly declared in the Audio monitoring device assignment in the settings and that you have “Monitor and Output” selected for the other device you wish to hear.
Again, be careful not to use the speakers’ source as an audio source in OBS itself, or you’ll get that positive feedback loop that will destroy your hardware.
If this does not solve your problem, try updating all of your drivers and your operating system.
Tracks Are Also a Powerful Tool At Your Disposal
Finally, We have “Tracks.” Tracks are only important for recording purposes. If you only stream, you are free to ignore this section, However, if you record, It is advised to separate each device onto its own track, except track 1, Which is passed to your stream by default.

This may change in the future if the streaming services like Twitch or Glimesh offer multi-track support, a feature I really wish they had. Doing so will allow streamers to mute out music tracks, or replace them in case of copyright changes to any audio used in stream vods without losing game audio or voice commentary should portions be muted due to automated systems. It would make the DMCA process a much simpler beast to manage, I’ll tell you that.


