

In this article, I will teach you how to use the OBS automatic scene switcher to make your life easier for your live streams. As for why you want to use this tool – that comes from the fact that it helps to keep the attention of your audience. Additionally, I’ll tell you about an alternative scene swapping method that works differently from the one built into OBS Studio.
Table of Contents
How to Access the OBS Automatic Scene Switcher

To access the OBS automatic scene switcher:
- Left-Click on Tools, located in the top left main menu
- Select Automatic Scene Switcher
How the Scene Switcher Works
When I first encountered the tool, I initially thought it worked like a timed sequence switcher. However, after fiddling with it, I learned that it had nothing to do with time-based switching.
How it works is that you specify a window that acts as the trigger for a scene switch. Then, when you select that program, it becomes the active window, and OBS will swap to the scene you assign to it.
For example, say you are streaming a game of Rocket League. You are on a losing streak, so you switch gears to a relaxing builder game like Space Engineers. Well, if you set up some custom scenes explicitly designed for those two games by simply closing Rocket League and opening Space Engineers, the scene will swap to the tailor-made scene for that game when you use the OBS automatic scene switcher.
And this can be done for every game or application that OBS can see. Now, it might take some trial and error to find the program your looking for, as the naming convention isn’t exactly intuitive, but given a bit of patience, it’s pretty easy, all things considered.
Why Use the Automatic Scene Switcher?
Since audience retention is one of the most challenging aspects of maintaining growth as a live streamer, it is a priority to figure out fun ways to keep people watching your content. One of the ways that you can accomplish this is to make a change that draws attention to itself. This stems from the fact that human instinct makes us naturally highly aware of changes in our vision.
This trait was essential for humanity in our ancestor’s times, as it kept us alert to the potential dangers of hungry predators. That isn’t as important these days, but that survival sense can be utilized today in ways that can be beneficial for marketers, content creators, and more. It is the very definition of eye-catching.
That leads me to the OBS automatic scene switcher tool. It makes your life a little bit easier and switches your scenes based on the active window.
Maybe you want to use multiple cameras and easily shuffle between them without lifting a finger. With the Automatic Scene Switching tool in OBS, that becomes an easy task.
Advantages of the OBS Scene Switcher:
- You can focus on your content and not worry about forgetting to change scenes
- It’s automation – less for you to do
- It is a powerful attention grabber when used well
- Easy to set up
Disadvantages of the OBS Scene Switcher:
- No time-based transitions built-in
- A lot of work to initially set up
- Requires multiple scenes to be designed beforehand
- Takes away a bit of control over your scenes until you disable it
Prepping the Scene Switcher
Before you can utilize this powerful tool, you must create the various scenes that contain the sources you intend to use. This is the most time-consuming step, but it helps to have a plan in place before jumping into it.
For example, you will need to decide how the scene will change.
- Webcam position
- Webcam size
- Main content
- Overlays
- Etc.
Configuring the Automatic Scene Switcher
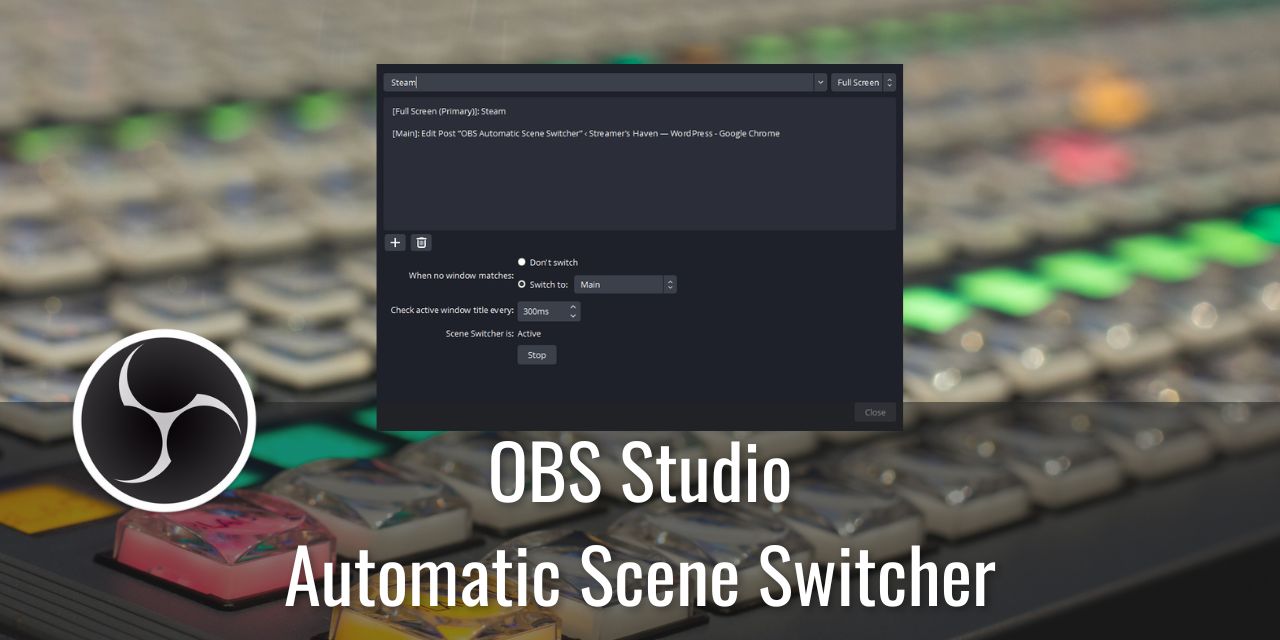
Once you have the scenes made, you merely need to assign the window in the scene switching tool and turn the feature on.
To do this:

- Select a Window in the long dropdown field
- Choose a Scene you want that window to transition to
- Left-Click on the + button to add the trigger
- Ensure that the Scene Switcher is Active
- Left-Click the Stop button to prevent automatic scene swapping
As for deleting triggers, simply:
- Left-Click the one you want to delete
- Left-Click on the Trash button
When you are finished with your automatic scene swapping triggers, simply click on the close button, and watch as the magic happens. You may need a second monitor to see the swaps, as tabbing out may transition you to a different scene.
I recommend setting up a fallback scene, “When no window matches: Switch to your main scene.” That is, of course, up to you, but you may as well go all the way with automation.
Alternative Methods to Swap Scenes Automatically
The application-based scene switches definitely have their place, but it is a specific tool to meet a specific need. I’m going to address an alternative – Time-based transitions. This method is substantially more complicated to set up, but this one-time setup will continue to work for years to come, provided the software you use maintains macro functionality.
Time-based Transitions – Create a Looping Macro
If you have a gaming keyboard and/or mouse, the software that handles the device’s settings will likely have the ability to create macros. Using a macro, you can assign hotkeys to the scene transition functions and program in some delays multiple minutes long in between the transitions hotkey commands.
This time-based approach to swapping scenes can be very helpful for multiple camera setups, as you can easily switch between the camera scenes simply based on time.
Personally, I like this method better, as you can toggle the macro on or off with a macro key or even a Stream Deck, and it isn’t program dependent for it to function. This approach is, in my opinion, better than application-based scene switching, as it can run on autopilot for your entire live stream, increasing production value for your content without you lifting a finger.
Pros:
- Autopilot alternate scene transitions
- Easily toggle on or off looping functionality
- Can be controlled by an Elgato Stream Deck
- It will work so long as the macro functionality of your driver software for your gaming devices is intact
- Can open programs you assign
Cons:
- Can be difficult to wrap your head around the macro creator
- Prone to user-error
- Loss of control over scenes while the macro is running
Creating a Scene Transition Macro in Logitech G-Hub
For those of you who use Logitech products, you’re in luck. I will show you a quick tutorial on how to create a macro in the G-Hub Software.
- Open up G-Hub
- Select any of your HID (Human Interface Device like keyboard or mouse)
- Select the + button on the left of the interface
- Select Macros
- Left-Click on the Create New Macro button
- Name the macro “Automatic Scene Switcher Macro” or really anything you want
- Select Toggle as your macro type
- Deselect Use Standard Delays
- You’ll need to manually assign delays for all the keys. Use 50 ms for any modifier key (ctrl, alt, shift), and the first number.
- The number key delay just before the next modifier key is where the long delays go.
- Left-Click on the big + button next to the words Start Now
- Press and hold Ctrl and Alt on your keyboard and press the 1 key
- Repeat Step 10, and increment the number up 1 for as many scene swaps you have
- Remember, the macro will continuously loop until you press the trigger key again.
- Modify the delays in between the number keys.
- Remember, the delays are counted in milliseconds. 1000 ms is 1 second, 10,000 is 10 seconds, and so on.
- I recommend a delay of about 3 seconds (3,000 ms) to a minute (60,000 ms). Shorter delays should be used only on scenes with minor differences, such as a different webcam source in the same place as your primary camera. The larger the variation between sources, the longer the delay can and should be.
- You can make the delay even longer if you want – see what works best for you!
Note: You can have 12 macros per modifier using this method. 12 is more than enough for most people, but if you need more transition effects, add a shift to your macro and hotkey. Ex. Ctrl + Shift + Alt + 1.
Now that this is set up, you will need to configure scene transition hotkeys. I’ve linked to my guide on how to do that.
Conclusion – It’s a Super Useful tool for Streamers
Ultimately, the goal of this post is to teach you a little bit of automation to make your streaming process just a little bit easier. This tool by itself won’t make your stream explode to new heights, but clever use of the scene-switching properties can really up your content’s ability to retain the attention of your audience.
I hope you found this article helpful! It was a fun one to write about! Be sure to check out more OBS Tutorials I wrote if you want to learn the ins and outs of the program!