


A Twitch profile banner is an image that shows up at the top of your channel. This is used to accent the top of your channel when you are offline. In addition, you can use it for calls to action to your other content, such as mentioning your Twitter or YouTube channel, and you can add a description of what you can find on the channel when it is live.
A banner is an optional addition, but I recommend creating a stand-in vs. the default tiled name that Twitch sticks you with. That look just doesn’t look particularly good, in my opinion.
I digress; you probably don’t care too much about my opinion regarding the default twitch banner, so we’ll leave it at that. Instead, let’s waste no more time and get into the juicy details of the Twitch Profile Banner so you can get back to streaming and creating amazing content!
Table of Contents
The Banner Dimensions & Details
| Max Dimensions | Filetypes Supported | Max filesize |
|---|---|---|
| 1200×480 | PNG, JPEG, GIF (first frame only) | 10 Megabytes |
The maximum for the Twitch Profile banner size is 1200×480, and you’ll want to ensure any text that appears on it does not get hidden by the floating elements towards the center of the page. This space is great for a call to action to your other content because it is the first part people see when they swing by your offline channel page.
The maximum file size is 10MB. With good compression and the correct file type, you’ll barely use more than 100KB at that size, though, so the limit is kind of silly. I deal with images daily on my blog, and my images on this site rarely exceed 80KB in most cases at 1280×480 and 1280×640. (I serve smaller versions where applicable, too, to really inch out that extra page load speed.)
To add the banner:
- Navigate to your Profile Settings
- Under the second box, labeled Profile Banner, upload the banner that you create
Does Twitch support Animated Profile Banners?
Unfortunately, the answer to this is No. Even though Twitch does support the GIF format, animations do not play on the profile banner, and it only displays the very first frame. The fact that they support the gif format, which is usually associated with animation, makes this misleading.
I really do think that Twitch should add an asterisk and mention below “Only shows the first frame of an animated gif” or remove support for it altogether.
What Makes a Good Twitch Profile Banner?
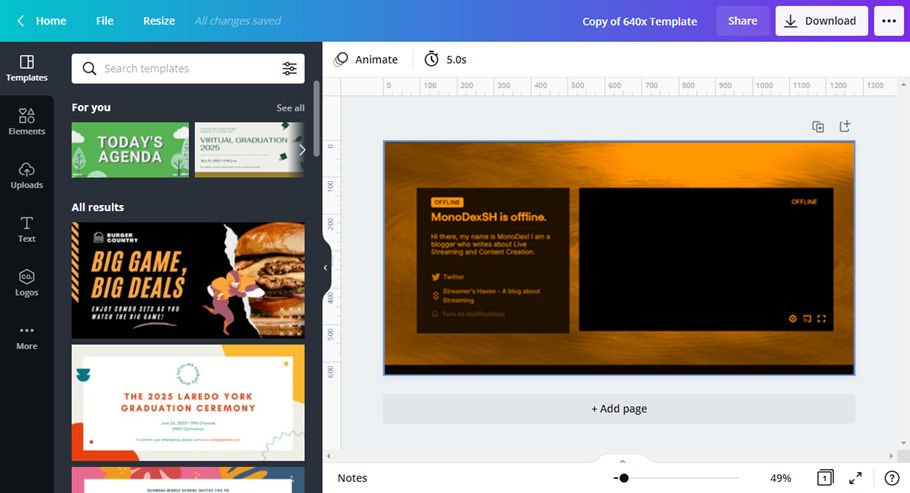
The Twitch Profile banner is a tool to draw people’s eyes towards your about me and video banner. As you see in the first image on the page, your “about you” panel is front and off-center and to the left of your Offline video player banner. Therefore, the best way to utilize the banner is to make it stand out from the rest of the site – bright colors that starkly contrast the surrounding area by a ratio greater than or equal to 5:1.
I get this number based on the accessibility guidelines for contrasting colors, making text easier to read. I use this tool to build a color pallet for my designs to make them legible for people to read without eyestrain. Try to adhere to this design philosophy when designing a banner, or really any outward-facing design.
Also, I recommend that you ensure you fill the area entirely – don’t leave uncolored black boxes where the overlaid elements are on a desktop device because mobile and other devices scale the image and presentation substantially.
Do’s:

- Conform to Accessibility guidelines for your color choice
- Use Dimensions of 1200×480
- Use a JPG, PNG, or GIF format
- Include your Logo (Optional)
Don’ts:

- Don’t leave any black boxes where the about you section and the Video banner appear in the final image (You can have a temporary layer to cram important info in there)
- GIF format will not be animated, even if it is an animated GIF. It will only use the first frame (Super misleading, I know.)
Tools to Help You Make Your Own Profile Banner
My tool of choice for images that is easy to use is Canva. You just need to be careful about which assets you select for it, as some are not safe for commercial use. With that said, many options are safe to use, and I regularly use them to make the images that appear on Streamer’s Haven myself.
You don’t need the pro version, but if you find yourself making a LOT of images, say if you were making some YouTube Thumbnails, you might find the expanded assets list in the pro version to be invaluable and worth the monthly subscription. In my opinion, it is well worth the investment, as paying an artist to make custom thumbnails can get expensive quickly.
For an example of how expensive I mean,
- I was quoted around $16 an image at the low end
- Some even quoted as high as $130 an image.
- For a blog that includes 4-6 images a post, and posts one a week, that’s up to $384 spent on the low end per month on custom images alone
- On the High end, we’re talking about a whopping $3120 a month. Yikes!
Now that $12 a month cost that Canva charges start to look a bit less intimidating.
With that said, there is nothing wrong with hiring an artist once you can turn a profit from your efforts. A professional artist will usually make far better images, and you don’t have to have the hassle of dealing with it yourself. This investment improves the quality and gives you more time to invest elsewhere. It’s just not required when you are first getting going, and I’d recommend against it unless you have a healthy income where you can afford the images you need.
There is also GIMP, which I use alongside Canva to do certain effects for specific images that I have a particular look in mind for. GIMP stands for GNU Image Manipulation Program and is a free, open-source competitor of Photoshop. In fact, it is a reasonably popular image editing software. It is so good that I can do most things in gimp on the banner that you can do in photoshop, minus a few of their newer tricks involving AI.
I definitely recommend checking it out. At the very least, it is 100% free, so you’ve nothing to lose by trying it. In addition, there is a boatload of video tutorials on YouTube on how to use it and its many filters, so you are only a search away from figuring out what you have in mind for it.