

Discovery on the Twitch platform leaves a lot to be desired. Many individuals who try to gain fame on the live streaming site often stream for years, and never quite pull an audience larger than 5 people. This is because the features of discovery on the platform are horribly inadequate. Even so, utilizing what is available will help you to gain that initial traction. In this article, I’m going to teach you how to enable store past broadcasts on Twitch.
Like my article on How to see who follows you on Twitch, this one dives into the features of the creator dashboard to do so. For mobile users, this can be a bit of a pain, as the only way to get to the creator dashboard on a mobile device is to directly navigate to it using https://dashboard.twitch.tv. The reason that this doesn’t have a dedicated button link on the site, is because the creator dashboard isn’t fully mobile optimized, so be aware of that if you are accessing these pages on a mobile device.
Table of Contents
Enabling store past broadcasts on Desktop

As a testament to Twitch’s ability to keep their interface organized, if you were to go to the Video producer, and click the dashboard settings link in the notification that pops up, you would be sent to the wrong place (The link isn’t up to date from their recent interface overhaul).
Instead, you’ll need to access your Creator Dashboard and navigate to the Stream settings manually.
- Click on your Profile Icon
- Go to Creator Dashboard
- Expand the Settings tab in the left navigation menu
- Click on the Stream button
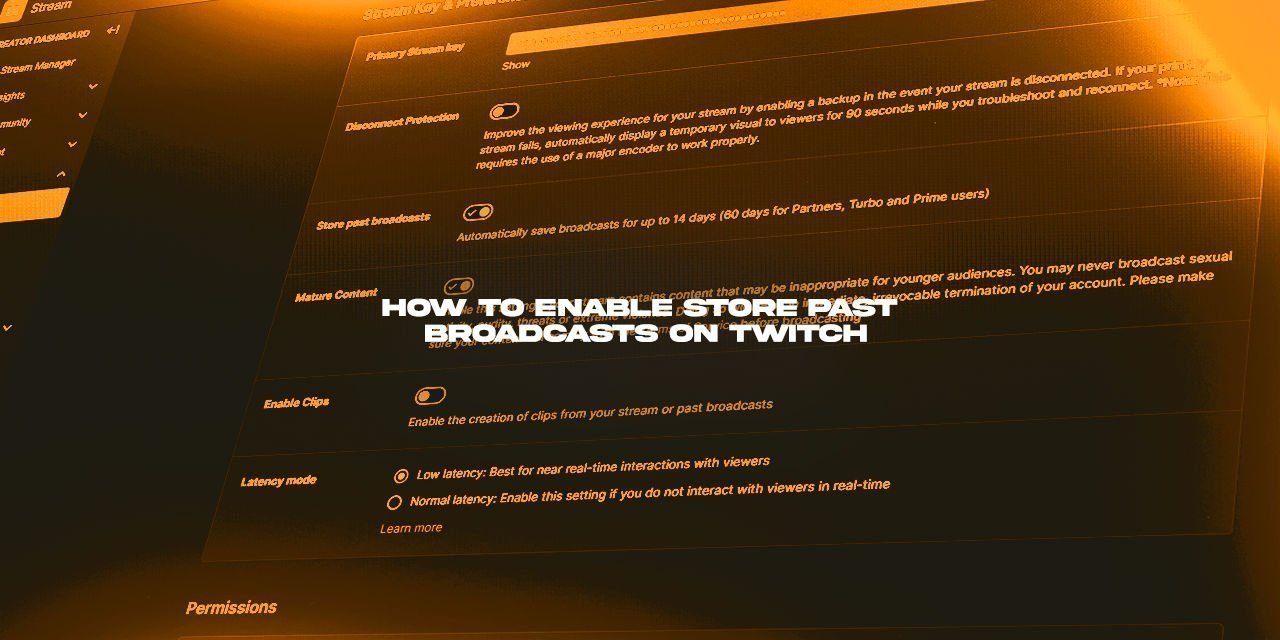
- Three boxes down, you should see a toggle switch labeled Store past Broadcasts
- If it is Purple, with a checkmark visible, the feature is enabled, and all future broadcasts will be held on Twitch for 14 to 60 days, depending on your Amazon Prime status or if you are a Twitch Partner.
A second way to enable this feature would be to go to your dashboard using this link. Doing this will automatically add your channel name into it if you are logged in to Twitch. Once there, continue on from step 3 in the list above.
Enabling store past broadcasts on Mobile
Once again, due to the inability to access the Creator dashboard on a mobile device by default, we will need to do some finagling with the URL to gain access to the page with this toggle setting. Simply copy this URL from below, and paste it into your browser. Swap out the text “YOUR_CHANNEL_NAME_HERE” with your channel name, et voila, you can now enable the store past broadcasts feature on a mobile device.
https://dashboard.twitch.tv/u/YOUR_CHANNEL_NAME_HERE/settings/streamThis also works for Desktop, if you don’t feel like going through the 5 clicks to enable that setting the standard way.
Drawbacks of the Store Past Broadcasts Feature
| Drawbacks Quick List | Extra Info |
|---|---|
| Only lasts for 14 days | 60 days if your account is attached to Amazon Prime |
| Reduces the quality of the video even further than the live stream itself | The Video is Hyper Compressed for storage purposes. |
| If you used copyright-protected music or your stream contains music from a video game, you can get hit with a DMCA from your past broadcasts | Consider checking out this comprehensive collection of Stream-safe music. |
One of the major drawbacks to a live stream is its sheer size – a single broadcast can span multiple hours. If you were to record that broadcast locally, you are looking at several gigabytes consumed per broadcast. This means that you will likely fill up your entire computer with the span of a few weeks, to even a few days – Depending on the quality of your recording settings and your total available storage.
By using the Store past broadcasts feature on Twitch, you can save your streams for a total of 14 days by default – 60 if you have an Amazon Prime account linked to your Twitch account. This window is there to give yourself time to upload the stream to an archival YouTube Channel.
Additionally, the broadcast video is compressed for storage purposes – its quality is further reduced from the live broadcast constraints of 6,000 bitrate. YouTube slaps another encoding compression on top of that – This can result in some ugly artifacts on the video at the end of it.
How to Enable (or disable) Clips on Twitch
Also within the Stream Settings window in your Creator Dashboard is the toggle to enable or disable clips on your channel. For most of Twitch’s history, the unanimous decision of the streaming community at large was to have clips enabled all the time – and I still agree with this particular standpoint.
However, due to the DMCA strike scare, many are opting to disable the feature entirely, choosing to omit rather than risk a strike. They feel this way because what content constitutes a DMCA strike isn’t exactly cut-and-dry, especially considering that some people have received strikes for in-game music.
If you feel you want to enable this feature, knowing the risks that it could bring if you unknowingly act as a vehicle of copyright infringement, then you can do so within the Stream settings.

Bonus: How to edit the Thumbnail of your past broadcasts
This is a mostly untapped feature that not many know about, and I’m pretty excited to tell you about it. Did you know that you can change the thumbnail to anything of your choice for your past broadcasts in addition to the Video Title? It even uses the same dimensions as a YouTube Video Thumbnail.
- 1280 px by 720 px
To edit the Thumbnail of a video/past broadcast, You’ll need to go to your video producer page. You can very easily access this page directly from the dropdown menu that appears when you click on your icon in the top right of the screen.

Once there, click on the three dots of a video that you want to change the thumbnail of, and in the new menu that appears, click Edit.
Within this new window, you need to scroll down until you see this icon, and click it to upload a custom thumbnail of your choice: