

Using transitions in DaVinci Resolve 17 is similar to adding text. You can access the pre-existing transitions library by accessing your toolbox within the effects panel, and expanding “Video Transitions”. You can even create your own transitions, and there are a huge number of youtube videos going into the process of making your own.
I’ve included a custom transition
Table of Contents
The Process –
Adding a transition to DaVinci Resolve 17 is extremely easy – Simply drag the transition effect in between two different clips, and a transition layer is added over the clips. It looks a little bit like this:
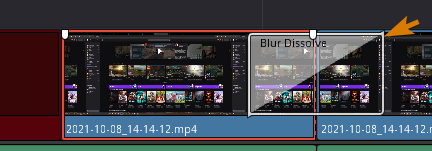
As you can see, there is a white rectangle that is half-shaded that is added. This is the basic transition effect, and it is easily adjustable to suit your needs.
- To Adjust the duration of the Transition effect, simply left click on the edge of the white box on the left or right
- Your mouse icon must look like the following image before you click on the effect. The box will turn red when it is selected

- Drag your mouse closer to the center to speed the effect up
- Drag your mouse away from the center to slow it down
To modify other properties of the transition effect, you’ll need to take a look at the settings panel on the right while the transition effect is selected. You can alternatively adjust the duration within this panel on the right, should you choose to.
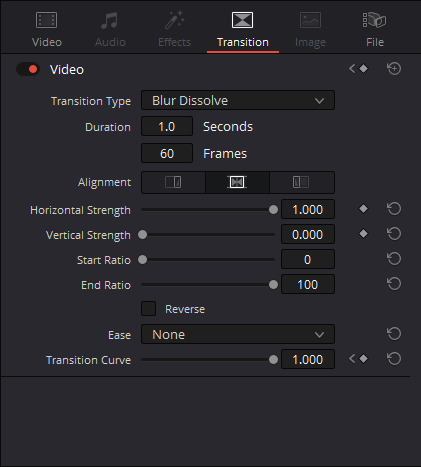
Here, you can modify all sorts of values for the basic effect of the transition.
Creating Custom Transition Effects
Did you know that you can create your own transition effects in DaVinci Resolve 17? This is one of the editor’s best features, and it is actually pretty easy to do. In fact, I made one of my own, which is a sliding blur effect – something that is fairly popular on YouTube these days.
This is done within the Fusion editor:
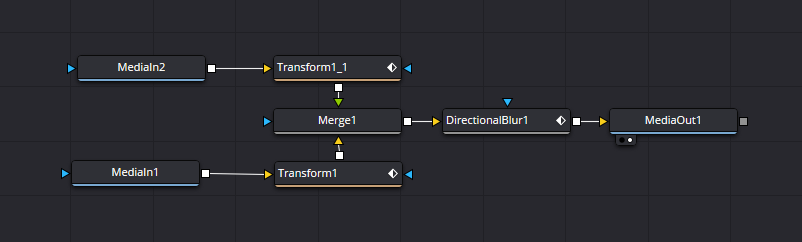
The image above shows the node tree for my custom effect that I made to add a motion blur effect to my clips, as well as slide the clips right.
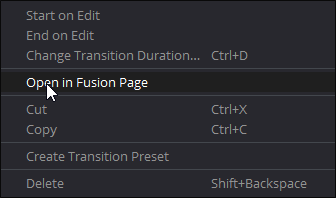
First, to get there, you need to add a standard transition, then right-click on it in the edit mode timeline.
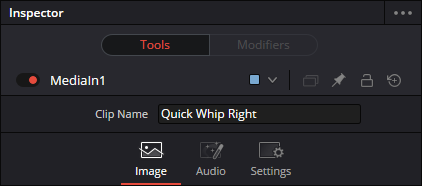
At the start of the tree, you have Media in 1, which is the clip you are transitioning from, and media in 2, which is the clip you are transitioning to. Before you begin, let’s start by left-clicking on the media in 1 node, and changing the clip name to Quick Whip Right.
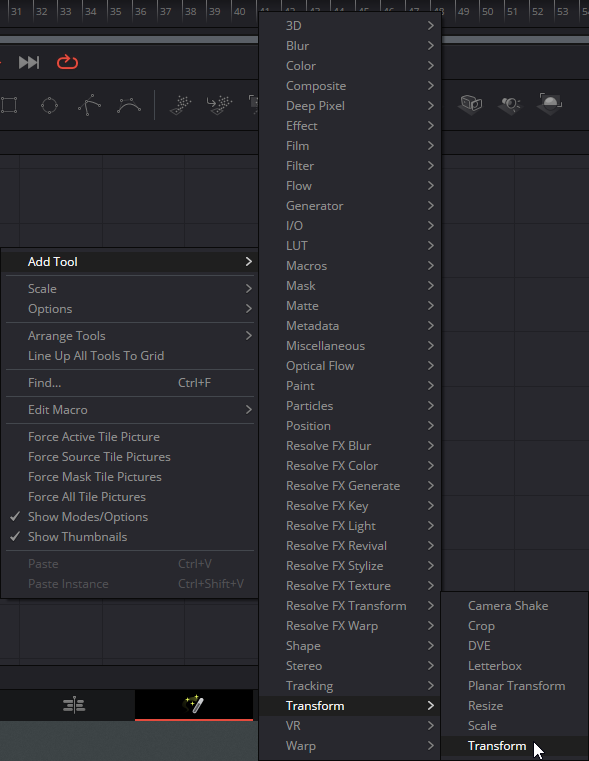
These clips each go into a Transform node, which you can add by:
- Right clicking on the grid
- Hover over “Add Tool”
- Hover over Transform
- Click on Transform
- Now, you can left click on the White square next to media-in 1, and drag it into the yellow in for Transform 1
- Repeat this process for Media in 2, with it’s own dedicated transform node
- Next, you need to click on one of the transform nodes, and under the controls, set the center X value to Negative -0.5
- The other transform node should be set to Positive 0.5
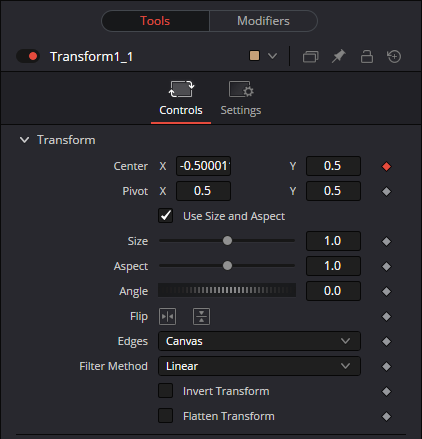
- The image above shows the value to be slightly above – if you see this, then you aren’t on the very first frame. You need to ensure you are on the first frame for this effect to work best.
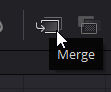
- Now you need to add a merge node for the two transform nodes
- Unlike the transform node, you need to add it using the toolbar at the top. The Icon looks like the image below.
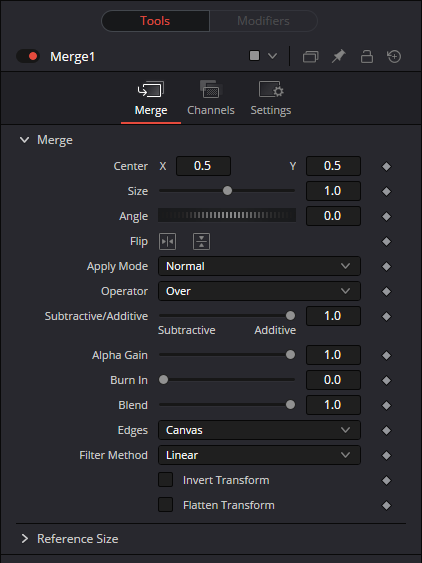
- Drag the white squares from the transform nodes into the merge node
- Here are my merge node settings
- Next, add a Directional Blur node
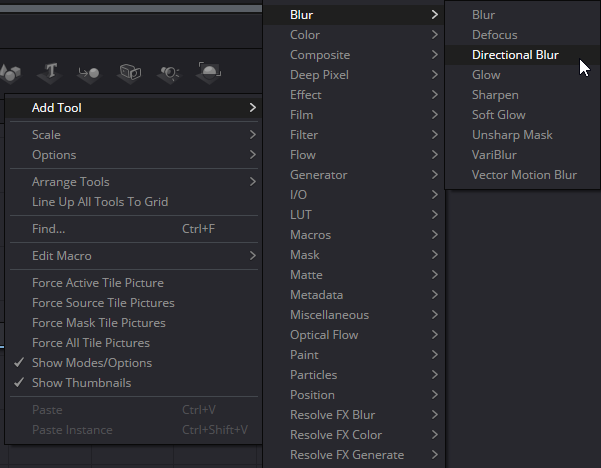
- Drag an arrow from the merge node into the Directional blur node(yellow arrow)
- Here are the settings I use:
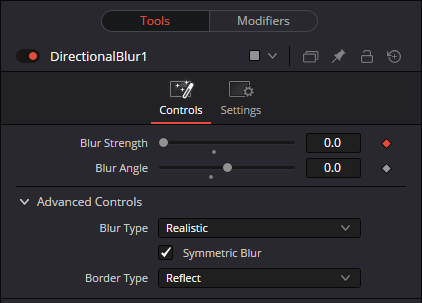
- note the red diamond, we’ll be configuring those later
- Finally, connect the node to the media Out, and get ready to configure your modifier diamonds
Configuring the Modifiers
The final step is to configure your modifiers for the effect. Select the Transform1 node, and click on Modifiers. If it is grayed out, make sure that the red diamond is enabled for the transform for the center coordinates.
In here, you’ll see the following values:
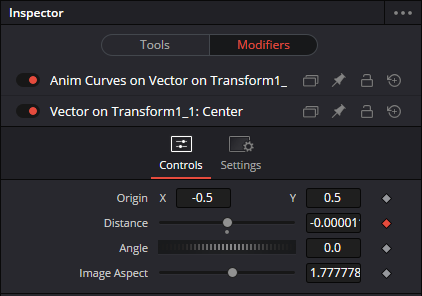
Make sure the diamond is red for Distance. On Frame 0, set the distance to 0. On frame 59, set the distance to 1.
You can play with the angle and image aspect if you like, I happen to like the look when it has an image aspect of 1.77777778.
The other transform looks like this:
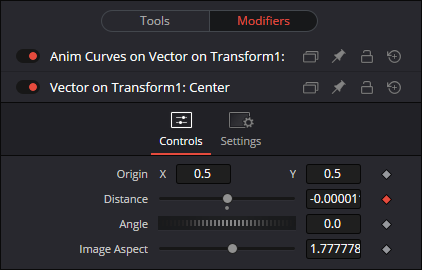
The only difference here is the origin value being positive.
Finally, the directional blur node settings are:
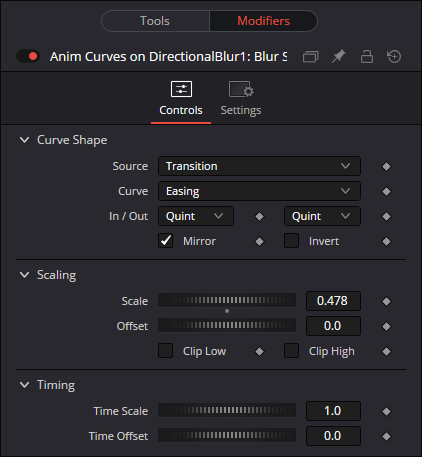
You can play with these values to change how your own transition will look, but this will accomplish the blurred effect used in this video that I made. Inverting the origin X value on your transforms will cause it to whip left instead of right, and adjusting Y coordinates causes it to whip up/down. Combining X and Y will cause it to whip diagonally.