

Hey there, how are you doing today? Welcome to Streamer’s Haven, your source for information about content creation, live streaming tips, and other media-related queries. In this article, I’m going to be going over a cornerstone of digital media, one that dictates the tone, emotion, and clarity of a string of frames. This cornerstone is lighting, and I kid you not when I say this, it is the most important part of cinematography, photography, live streaming, YouTube videos, and movies.
Specifically, I’ll be talking about the key light, or the main light for your subject. The key light can be any light that you utilize to illuminate a subject, such as a person you are photographing, a product you are recording on a rotating pedestal, or in the case of live streaming, yourself for a face camera. This light will dictate a few things, such as:
- The angle of the light
- Intensity,
- and Color target
It is also particularly important for live streamers and YouTube Gamers, who rely on the brightness of their monitors to act as a light for their cameras. It isn’t wise to utilize the monitors light for this, because it isn’t a consistent color, brightness, or intensity. This can result in your camera going haywire trying to focus on your face, because the lighting is in constant flux. Putting it bluntly, it looks extremely unprofessional – And it doesn’t have to!
Table of Contents
Light too harsh? Getting Hard shadows? Utilize Bounce lighting
Look, I know not everyone has access to disposable income. However, let me reiterate a point – It can be any light that is a consistent brightness. If you have a desk lamp, That is perfect. Use that! Just look for a light fixture around the house first. This is usually the most cost-effective solution for people, as the investment has already been made! I mean, Take a look at my light fixture!

Yes, I’m pointing the light at the wall. That is a lighting technique called bounce lighting. It is designed to greatly soften the light using your wall, or diffuse reflective board (Like Styrofoam). My camera greatly lowered the exposure, but I’m able to stare directly at the brightest part of the wall and not squit, an impossible task from 1500 lumen bulbs if you tried to look at them directly.
This technique is actually fantastic for a fill light position, but in a single light setup, it functions well as a key light.
What makes a good Key light for live streamers?

Let’s go into more detail on the mentioned points:
- K Rating – Color Temperature in Kelvin.
- You are looking for “Daylight” ratings of 5000k+. The closer it is to 6700k, the better for color accuracy.
- When using multiple light sources, it is ideal to keep them all the same color temperatures for the most natural appearance.
- Lumens – How bright something appears.
- The more lumens, the better for the camera or webcam.
- There is a hard limit for us to withstand the intensity of the light. For example; you don’t want to look directly at the light from the stadium panels or the sun. The higher the lumens, the more diffusion you will need for it to be safe for your eyes.
- Wattage – The power draw.
- Mainly a concern for Incandescent bulbs. If your light fixture of choice is only rated for 40 watts, you can’t use any bulb above 40 watts total.
- LED bulbs are highly power-efficient unless you have a powerful light like this Corn light bulb. I don’t recommend using this particular bulb for your light, as it is extremely bright. If you do insist on using it, you will NEED a diffuser to protect your eyes.
- CRI(Color Rendering Index).
- This is the key term to look for. As CRI dictates how accurately a light is able to mimic sunlight, it means we want high values to ensure it looks natural.

The Key light type – Incandescent vs Compact Fluorescent vs LED
Incandescent Bulb

Starting with the original lightbulb, we have the Incandescent bulb. This particular technology uses a strong electric current to heat up a thin tungsten filament. The heated filament then glows white-hot, outputting a color spectrum extremely close to 100 CRI. The lumens directly correlates to how much power the bulb draws.
It has some major drawbacks however and is used mainly by photographers for the most accurate colors possible.
- It has a Short Lifespan: 800-1000 hours
- Runs extremely hot; needs a substantial cool-down period before you can swap the bulb if it blows. It radiates light from high levels of heat.
- Very energy-inefficient – 6 bulbs can use as much as a powerful desktop PC running a game at full blast.
- Not a huge coverage area.
Incandescent bulbs have an efficiency of 16 lumens/watt on the 120V power grid. They are extremely power inefficient. Most of the energy sent into them is converted to heat instead of visible light.
However, among all the light technologies, it is the only technology that can very cheaply, and very easily reproduce a near-perfect 100 CRI.
Verdict:
We can not recommend an Incandescent bulb of any kind due to its high power use and short lifespan, even with the near 100 CRI. Plus it is just better for the world because we would be using less power and creating more waste after expending the light.
Compact Fluorescent Lights

The CFL was our first answer to the high power cost of Incandescent bulbs. CFL bulbs are able to output more Lumens at a lower wattage; This efficiency being around 60lumens/watt, or around 375% more efficient than Incandescent bulbs.
The CRI rating of CFL bulbs is typically pretty bad, however. They range from around 75 – 85 or so. This is due to how the technology actually omits certain parts of the spectrum entirely.
It does make up for this in its energy efficiency and low cost. For home use and work lights, a CFL bulb is a fantastic option, as it is very cheap and has an average lifespan of 10,000 hours or 10 times longer than an Incandescent.
Verdict:
For the purpose of streaming, we cannot recommend CFL bulbs. They have their uses, but streaming is not one of them. The CRI rating is just too low.
LED Bulbs & Strips

Light Emitting Diode technology was an amazing breakthrough for humanity. It provided a colossal efficiency bonus over even CFL bulbs, to a rating of around 150 lumens/watt, or 937.5% more efficient than incandescent bulbs. This means that you can get Much brighter lights than would be normally possible for tiny energy costs.
Modern LED technology is so advanced now, even a CRI of 99 is possible, at a cost. They tend to be very expensive with 90+ CRI values
Benefits:
- Extremely low power consumption at low wattage!
- High powered LEDS can consume a magnitude higher power than even incandescent, with some even in the 500-watt range
- Very high CRI capabilities
- Tons of DIY lighting potential
- The colossal life span of 30,000 hours or MORE!
Drawbacks
- High initial cost
- Potential for flicker on some designs
Verdict:
For streamers, this is the technology I recommend if you can afford it.
Led Light Formats: (4 Types)
The first choice we have is an E26 Style bulb, used in the standard sockets of light fixtures you might already have strewn about your house.
Next up is LED strip lighting. This light type is typically used in DIY setups, as they are the basic component used in Panel lights typically. They are a strip of leds, either flexible like tape or a rigid panel.
An LED Panel Light has fantastic light diffusion built into the light, typically using a bit of flexible strip light.
Finally, a ring light provides even coverage of light over the face of your subject (yourself as a streamer) which is an excellent stand-in for single-point setups.
Choosing the light to use as your Key Light
Now it is time to choose the type of light to use as your Key light. The type you choose to go with will be determined by how much room you have available in your setup, as well as your budget.
Entry-level solution – Use what you have
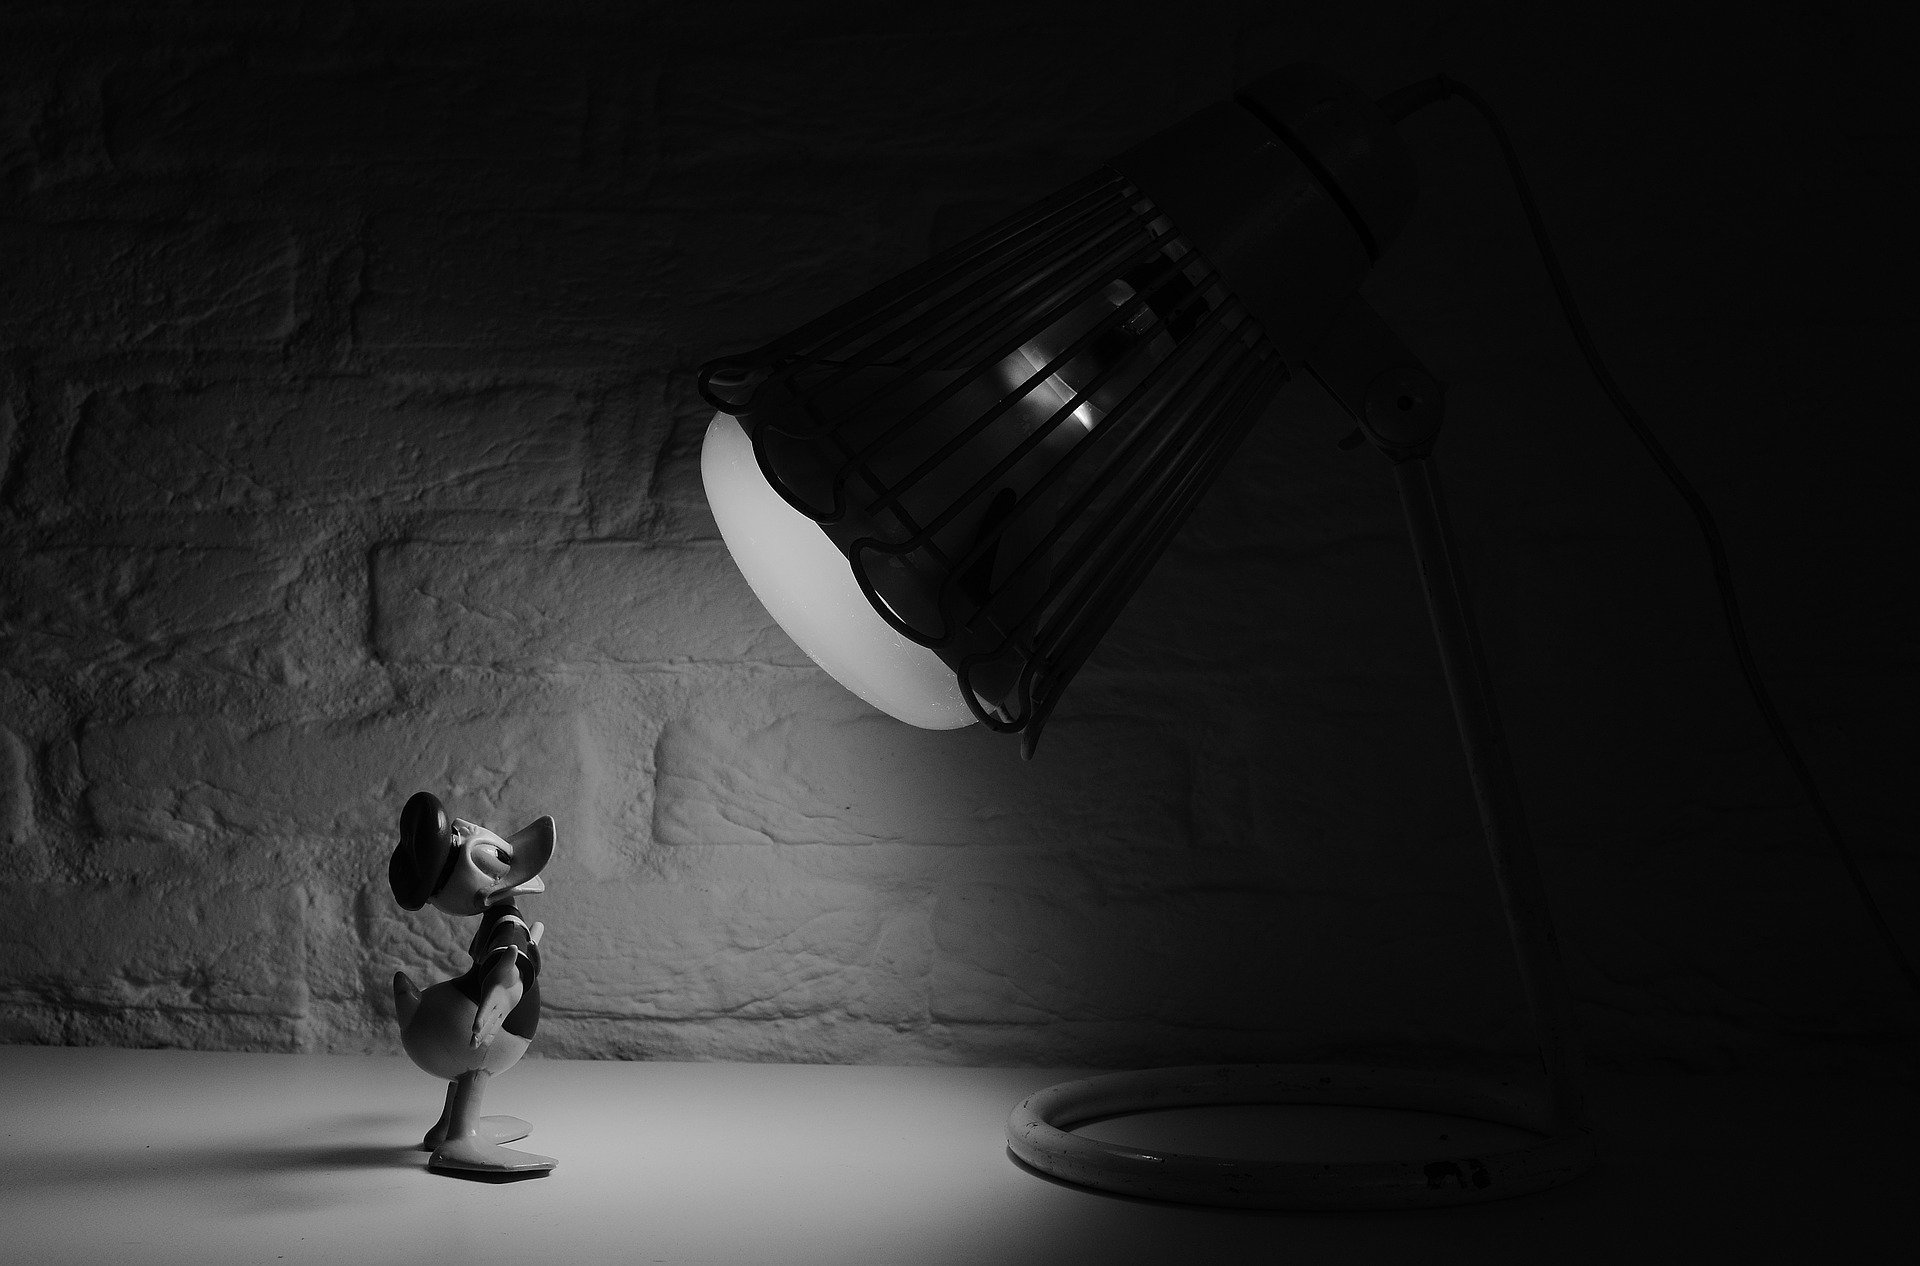
One of the simplest and potentially most cost-effective solutions for a new streamer is to use a desk light, similar to the one used in the Pixar logo. This gives you an adjustable, articulating light to position freely on your face. Check to see if you have one you can use from around your house.


This is the most basic light that would be useful as a key light for a streamer. The fact that it uses a standard E26 bulb also increases versatility, allowing many different grades of bulbs to be used in the same fixture. If you are used to bulbs, they are still an acceptable format.
The E26 socket supports every single type of light; Incandescent, CFL, and LED. Using this format is in our opinion, the most cost-effective, and the fixtures tend to be more decorative to appeal to a wider audience.
Editors Choice E26 Style Bulb in a basic light fixture
Philips LED A19 Frosted Light Bulb is the exact bulb I use myself. There is no flicker to worry about, the color temperature is ideal, and the lumens output by the bulbs are respectable – 1500 lumens per bulb.
The frosted coating helps diffuse the light, and you can use a piece of paper or some diffusion cloth over the fixture to further diffuse it. This is really only necessary if you don’t use bounce lighting, as mentioned above – Note that this must not be fully enclosed, the bulb does need airflow as the metal base gets somewhat hot and potentially start a fire. Leave a gap for airflow in any softbox enclosure.
Midrange Solutions – Most common key light used by streamers
DIY Light Strips –
For DIY projects, we recommend the Marswall LED 95+CRI strip. DIYPerks made a set of studio lights using these LEDs. In fact, that channel has SEVERAL different DIY light strip setups. We strongly recommend giving this channel a good look over if you are into DIY.
Also, you can make your own diffuser using a number of materials in your house.
Desk Mounted solutions –
Sometimes you don’t have the room for a light stand, but you do have some desk real-estate to spare. There are many options to choose from in this format.
This dual LED light by fasthomegoods or this wide-angle light by TROND both use a small array of LEDs mounted on a gooseneck and is connected to your pc or wall outlet via USB. they clamp on the edge of your desk or shelf. We rather like the gooseneck approach for its great flexibility.
If you can only afford a single light, a ring light would be the best choice. These lights are very good at illuminating your subject as the light wraps around your face well.
Some important points about desk clamps and mounts; They damage the finish on your desk! If this is a problem, then your only option is to use a weighted base light or a Light stand that is separate from your desk.
Panel Light Stand Mounted solutions –
Here is a rather cheap set of light stands you can use if you purchase a light panel that doesn’t come with a stand. Ideally, these light stands will extend at least to 35″, but 55″ and higher gives you a lot of flexibility in your setup. Do note the maximum weight limits so you don’t end up having your light fall like Paul Bunyan just cleaved it in two.
Our recommendation to buy is one of the Bi-color LED Panel Video light kits, which was covered over on EposVox’s Youtube.
To control these lights remotely, you will also need to buy a Wireless remote like this one.
These lights lack the ability to replace the bulb easily but make up for that with the ability to mount two camera style batteries in the rear of each panel, eliminating the need for wires going to these lights. This is especially useful if you are hard-pressed for power outlets, and can make shooting outdoors at night much easier.
Handy videos to understand how to use your lights effectively
With the tools and techniques described here, you are well on your way to dramatically improving the lighting of your face cam on your stream. If you want to explore more lighting techniques, I recommend checking out these videos that cover this subject.
- Olufemii Tutorials – Lets Talk Film Lighting: The Basics
- Tom Antos – How to Light a Film Like a Cinematographer|Job Shadow
- Aputure – How to Light the Cinematic Film Look
- Aputure – Cinematic Lighting 101 | How to use Diffusion
Tackle your audio next, and you are well on your way to a premium streaming experience.